Node-REDを使ってドット絵を表示する
動的にマトリクス表示するアプリケーションをNode-REDで作ろうと考えています。
DotGen.css – CSS Collectionというドット絵のCSSを生成してくれるサイトがありましたので、これでできるかためしてみます。
DotGen.cssの使い方
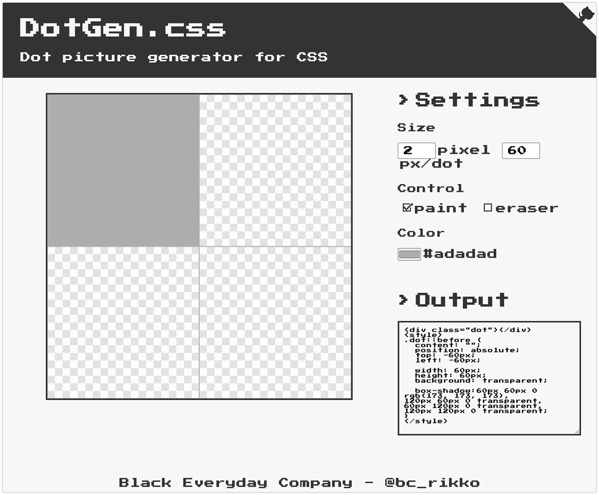
まずは2×2ドットのマトリクスを表示しました。
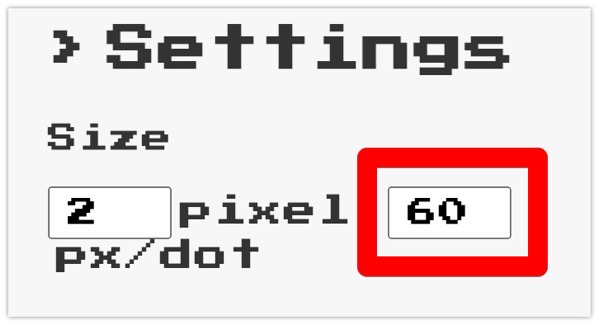
こちらの値で1ドットのサイズを設定できます。
最初の数字で縦横のマトリクス数が設定できます。
Outputにて下記のhtml+CSSが生成されます。
<div class="dot"></div>
<style>
.dot::before {
  content: "";
  position: absolute;
  top: -60px;
  left: -60px;

  width: 60px;
  height: 60px;
  background: transparent;

  box-shadow:60px 60px 0 rgb(173, 173, 173),
120px 60px 0 transparent,
60px 120px 0 transparent,
120px 120px 0 transparent;
}
</style>
Node-REDでTemplateノードを使って表示

http inノード、templateノード、http responseノードを使ってフローを作成。
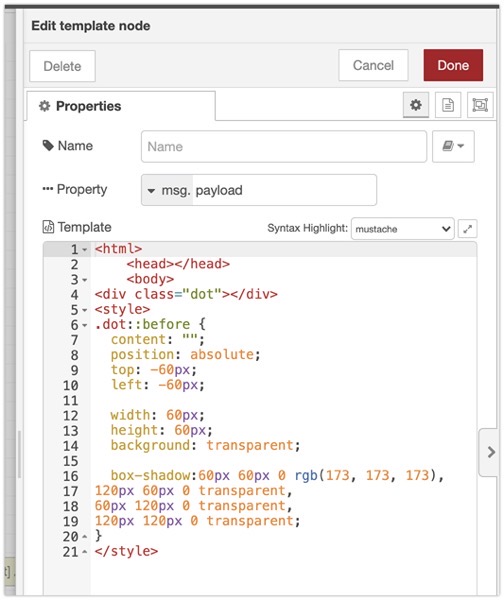
Templateノードには先程のOutputをそのまま貼り付け。
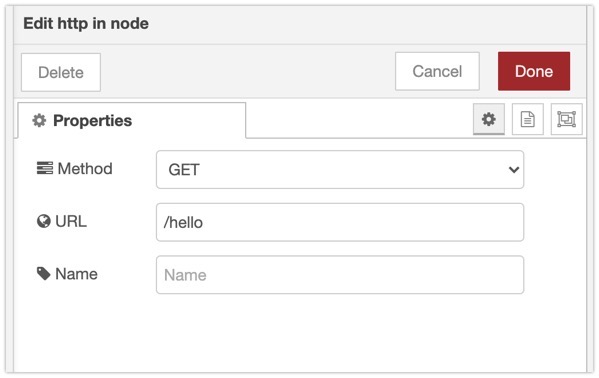
http inノードには、MethodをGET、URLは”/hello”としました。
これで http://localhost:1880/hello にアクセスすると

このように表示されます。
マトリクス部分を動的に表示したい
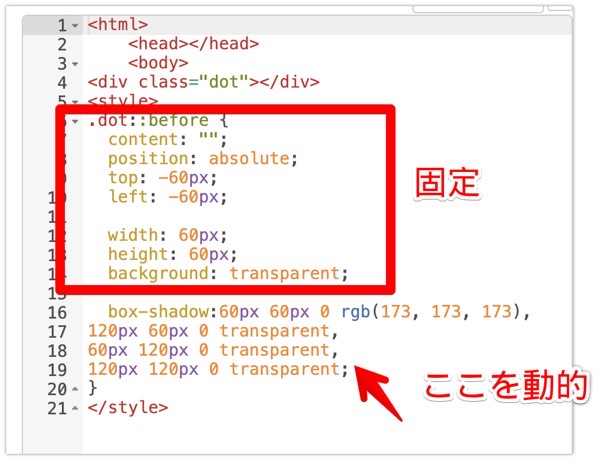
DotGen.cssから出力されるCSS部分をみてみると、ドットの状態によって変わらない部分と、変わる部分があります。
この変わる部分を動的に作ることができれば、ドット表示の操作ができそうです。
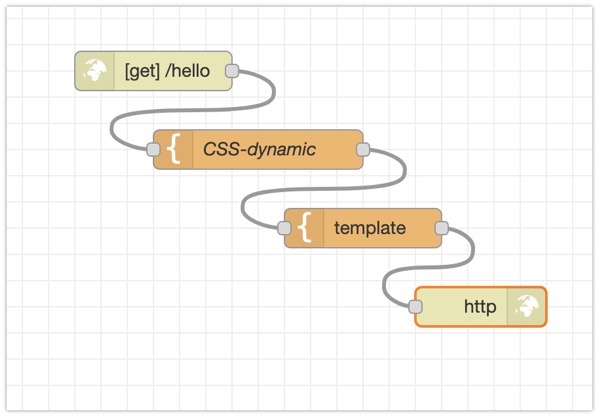
このようにフローを作成。
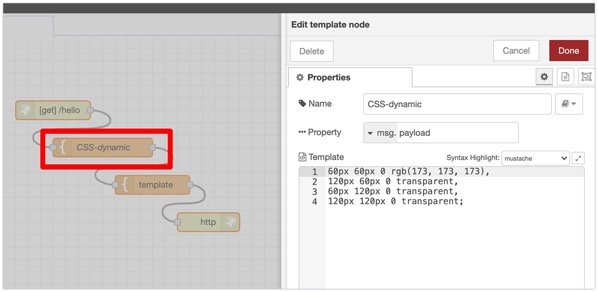
動的に生成するCSS部分をtemplateノードで作成。
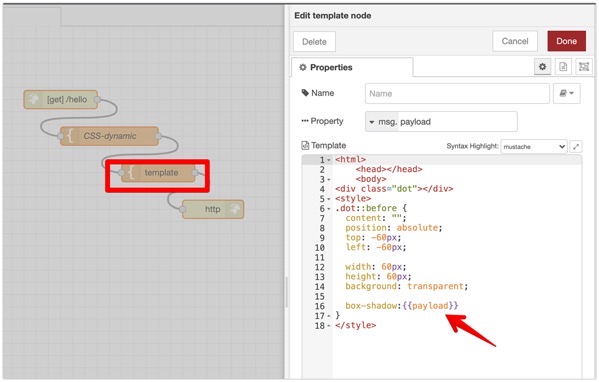
box-shadowの後にpayloadで差し込みました。
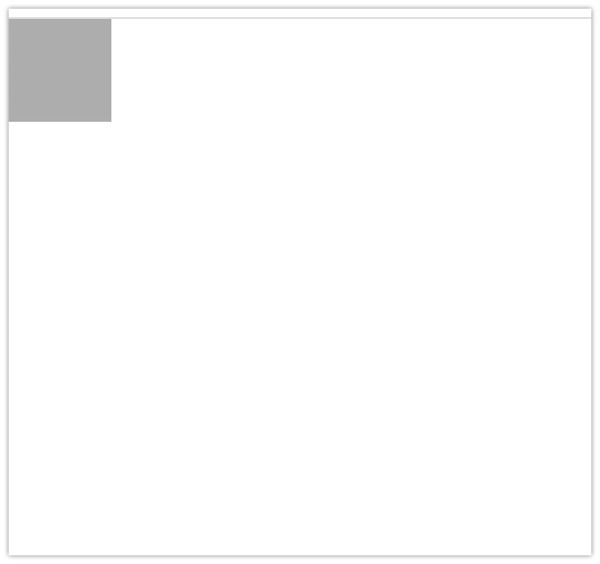
これで表示されました。
dot1とdot2で表示を切り替え
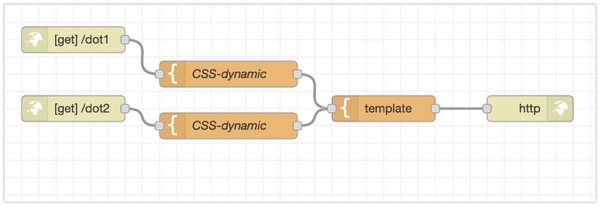
このようにフローを作成。http://localhost:1880/dot1とhttp://localhost:1880/dot2でCSS-dynamicの内容を変更。
[{"id":"59ff2a1.fa600d4","type":"http in","z":"1354c47f.07097c","name":"","url":"/dot1","method":"get","upload":false,"swaggerDoc":"","x":140,"y":140,"wires":[["e12f95d3.5f6668"]]},{"id":"266c286f.d993d8","type":"http response","z":"1354c47f.07097c","name":"","x":670,"y":220,"wires":[]},{"id":"c1a860bb.f14d5","type":"template","z":"1354c47f.07097c","name":"","field":"payload","fieldType":"msg","format":"handlebars","syntax":"mustache","template":"<html>\n <head></head>\n <body>\n<div class=\"dot\"></div>\n<style>\n.dot::before {\n content: \"\";\n position: absolute;\n top: -60px;\n left: -60px;\n\n width: 60px;\n height: 60px;\n background: transparent;\n\n box-shadow:{{payload}}\n}\n</style>","output":"str","x":500,"y":220,"wires":[["266c286f.d993d8"]]},{"id":"e12f95d3.5f6668","type":"template","z":"1354c47f.07097c","name":"CSS-dynamic","field":"payload","fieldType":"msg","format":"handlebars","syntax":"mustache","template":"60px 60px 0 rgb(173, 173, 173),\n120px 60px 0 transparent,\n60px 120px 0 transparent,\n120px 120px 0 transparent;","output":"str","x":320,"y":180,"wires":[["c1a860bb.f14d5"]]},{"id":"b7ad4099.56333","type":"http in","z":"1354c47f.07097c","name":"","url":"/dot2","method":"get","upload":false,"swaggerDoc":"","x":140,"y":220,"wires":[["2261bf9.36d704"]]},{"id":"2261bf9.36d704","type":"template","z":"1354c47f.07097c","name":"CSS-dynamic","field":"payload","fieldType":"msg","format":"handlebars","syntax":"mustache","template":"60px 60px 0 rgb(173, 173, 173),\n120px 60px 0 transparent,\n60px 120px 0 transparent,\n120px 120px 0 rgb(173, 173, 173);","output":"str","x":320,"y":240,"wires":[["c1a860bb.f14d5"]]}]
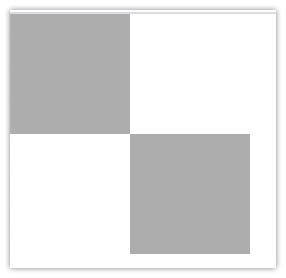
無事に変更できました。
for文でマトリクス部分を作成
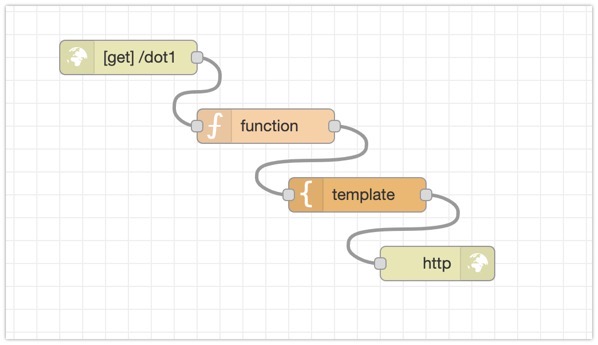
マトリクス部分をfor文で生成するようにしました。
↓ フローはこちら
[{"id":"266c286f.d993d8","type":"http response","z":"1354c47f.07097c","name":"","x":490,"y":560,"wires":[]},{"id":"c1a860bb.f14d5","type":"template","z":"1354c47f.07097c","name":"","field":"payload","fieldType":"msg","format":"handlebars","syntax":"mustache","template":"<html>\n <head></head>\n <body>\n<div class=\"dot\"></div>\n<style>\n.dot::before {\n content: \"\";\n position: absolute;\n top: -60px;\n left: -60px;\n\n width: 59px;\n height: 59px;\n background: transparent;\n\n box-shadow:{{payload}}\n}\n</style>","output":"str","x":420,"y":500,"wires":[["266c286f.d993d8"]]},{"id":"b7ad4099.56333","type":"http in","z":"1354c47f.07097c","name":"","url":"/dot1","method":"get","upload":false,"swaggerDoc":"","x":220,"y":380,"wires":[["88923119.bb9ad"]]},{"id":"88923119.bb9ad","type":"function","z":"1354c47f.07097c","name":"","func":"var x = 0;\nvar y = 0;\nvar pitch = 60;\nvar html= \"\";\n\nfor (i=0; i<2; i++){\n y=0;\n x = x+pitch;\n \n for ( o=0; o<2; o++){\n y = y+pitch;\n html = html+x+\"px \"+y+\"px 0 rgb(173, 173, 173),\";\n }\n}\n\nhtml = html.slice( 0, -1 ) ;\n\nmsg.payload = html;\n\nreturn msg;","outputs":1,"noerr":0,"initialize":"","finalize":"","libs":[],"x":340,"y":440,"wires":[["c1a860bb.f14d5"]]}]
functionノードのJavascriptはこの様に。
var x = 0;
var y = 0;
var pitch = 60;
var html= "";

for (i=0; i<2; i++){
    y=0;
    x = x+pitch;

    for ( o=0; o<2; o++){
        y = y+pitch;
        html = html+x+"px "+y+"px 0 rgb(173, 173, 173),";
    }
}

html = html.slice( 0, -1 ) ;

msg.payload = html;

return msg;
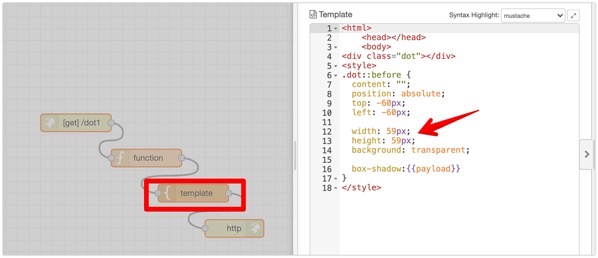
さらに、templateノードでwidthとheightを1減らすことで、仕切り線も表示できるようになりました。
マトリクスの大きさを変更
今までは2×2のマトリクスで表示していましたが、これを変更できるようにします。
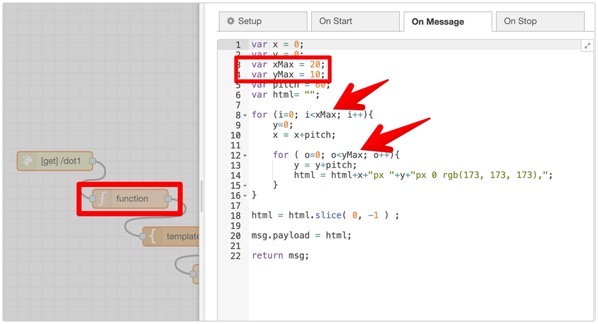
functionノードをこの様に変更。
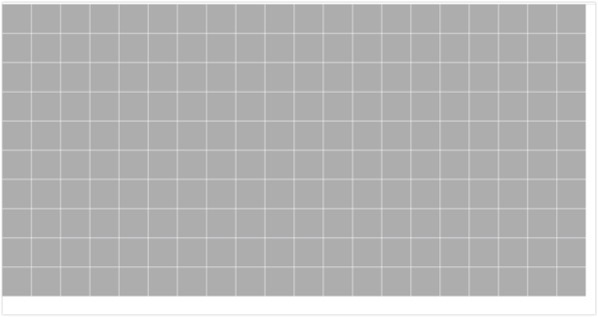
これで、20×10のマトリクスで表示されるようになりました。
濃淡を変数で表示
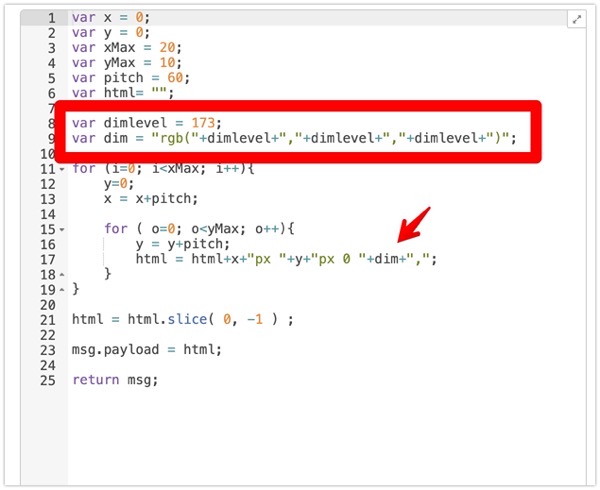
これで、濃淡をdimとして変数で表示できるようになりました。
背景を黒に
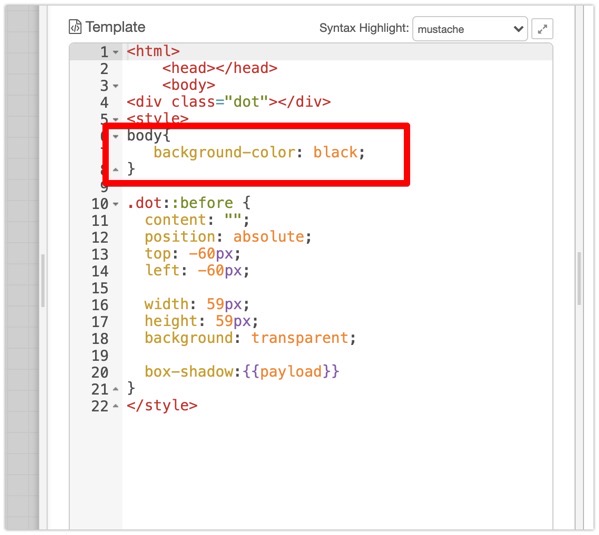
Templateノードを修正して、背景を黒にしました。
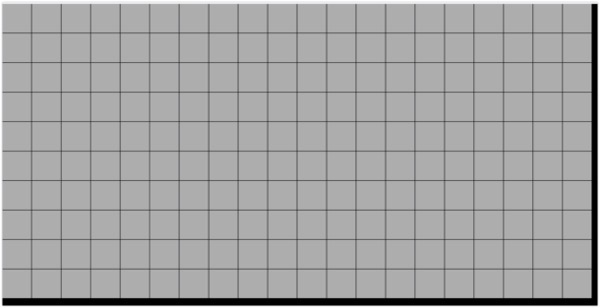
濃淡をランダムに
getRandom(min,max)という関数をつくり、濃淡をランダムで設定するようにしました。
↓ 参考記事
【JavaScript入門】乱数の作り方(範囲指定/重複なし/ランダム文字列) | 侍エンジニアブログ
var x = 0;
var y = 0;
var xMax = 20;
var yMax = 10;
var pitch = 60;
var html= "";

var dimlevel = 173;
var dim = "rgb("+dimlevel+","+dimlevel+","+dimlevel+")";

for (i=0; i<xMax; i++){
    y=0;
    x = x+pitch;

    for ( o=0; o<yMax; o++){
        y = y+pitch;

        // dimlevelをランダム生成
        dimlevel = getRandom(0,255);
        dim = "rgb("+dimlevel+","+dimlevel+","+dimlevel+")";

        html = html+x+"px "+y+"px 0 "+dim+",";
    }
}
html = html.slice( 0, -1 ) ;
msg.payload = html;
return msg;
// getRandom
function getRandom( min, max ) {
    var random = Math.floor( Math.random() * (max + 1 - min) ) + min;
    return random;
}
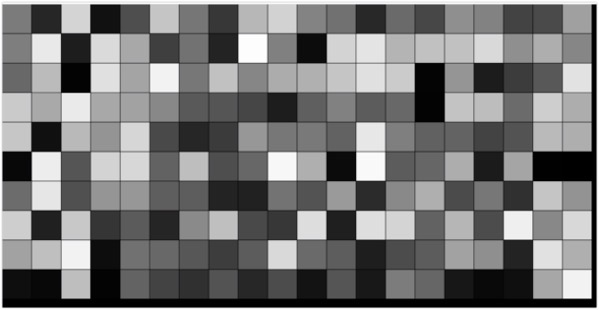
この様に、濃淡が0〜255の範囲でマトリクスに反映されるようになりました。
ブラウザを2秒おきにリロード
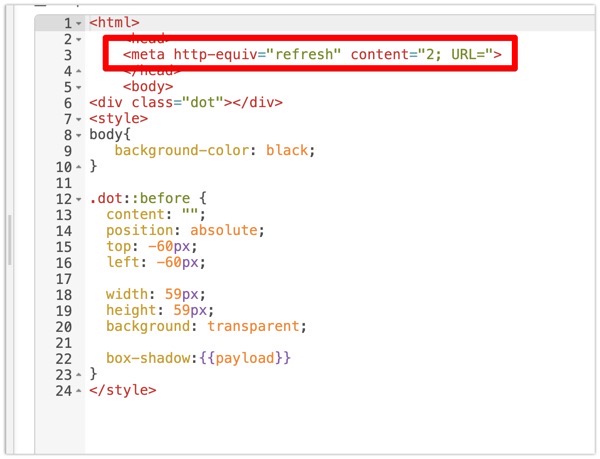
これで、ブラウザを2秒おきにリロードしました。
最終的なフローはこちら
[{"id":"266c286f.d993d8","type":"http response","z":"1354c47f.07097c","name":"","x":490,"y":560,"wires":[]},{"id":"c1a860bb.f14d5","type":"template","z":"1354c47f.07097c","name":"","field":"payload","fieldType":"msg","format":"handlebars","syntax":"mustache","template":"<html>\n <head>\n <meta http-equiv=\"refresh\" content=\"2; URL=\">\n </head>\n <body>\n<div class=\"dot\"></div>\n<style>\nbody{\n background-color: black; \n}\n\n.dot::before {\n content: \"\";\n position: absolute;\n top: -60px;\n left: -60px;\n\n width: 59px;\n height: 59px;\n background: transparent;\n\n box-shadow:{{payload}}\n}\n</style>","output":"str","x":420,"y":500,"wires":[["266c286f.d993d8"]]},{"id":"b7ad4099.56333","type":"http in","z":"1354c47f.07097c","name":"","url":"/dot1","method":"get","upload":false,"swaggerDoc":"","x":220,"y":380,"wires":[["88923119.bb9ad"]]},{"id":"88923119.bb9ad","type":"function","z":"1354c47f.07097c","name":"","func":"var x = 0;\nvar y = 0;\nvar xMax = 20;\nvar yMax = 10;\nvar pitch = 60;\nvar html= \"\";\n\nvar dimlevel = 173;\nvar dim = \"rgb(\"+dimlevel+\",\"+dimlevel+\",\"+dimlevel+\")\";\n\nfor (i=0; i<xMax; i++){\n y=0;\n x = x+pitch;\n \n for ( o=0; o<yMax; o++){\n y = y+pitch;\n \n // dimlevelをランダム生成\n dimlevel = getRandom(0,255);\n dim = \"rgb(\"+dimlevel+\",\"+dimlevel+\",\"+dimlevel+\")\";\n \n html = html+x+\"px \"+y+\"px 0 \"+dim+\",\";\n }\n}\n\nhtml = html.slice( 0, -1 ) ;\n\nmsg.payload = html;\n\nreturn msg;\n\n// getRandom\n\nfunction getRandom( min, max ) {\n var random = Math.floor( Math.random() * (max + 1 - min) ) + min;\n \n return random;\n}","outputs":1,"noerr":0,"initialize":"","finalize":"","libs":[],"x":340,"y":440,"wires":[["c1a860bb.f14d5"]]}]
まとめ
Node-REDを使ってドットを表示させるフローを作成しました。
あとはこれをajaxにしたいですね。
Node-RED で(普通の)ウェブアプリケーションを作る : まだプログラマーですが何か?
