bOS Configuratorの使い方の紹介です。
bOS Configuratorの立ち上げ
.jpg")
右上のメニューをクリック
.jpg")
“+ 追加”を選びます。
.jpg")
”マニュアル設定”をクリックして、”検索”をクリック。

接続するサーバーを選んでクリック、”OK”を押します。
.jpg")
今回追加したサーバーをクリック。

これで、bOSサーバー側の準備完了です。
ETSのプロジェクトを作成

スイッチアクチェーターと位相制御モジュールを使い、上記のようなグループアドレスでプロジェクトをつくります。
.jpg")
作成したETSプロジェクトをエクスポートします。

エクスポートするファイル形式は、”esf”を選択。
ETSのプロジェクトをbOS Configuratorで取り込む
.jpg")
Buidling > Devicesをクリックして、”+”をクリックします。
.jpg")
追加するデバイスは”KNX”を選び、”Add”を押します。
.jpg")
“ETS Import”をクリックして、先程ETSでエクスポートしたファイルを読み込みます。

グループアドレスが表示されました。

Statusはコントロールアドレスに紐付けられるので、 ‘0/0/1’と’0/1/2’をImportします。
.jpg")
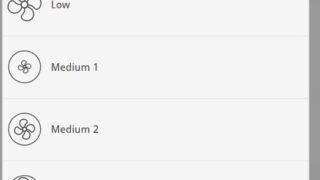
Brightness Valueは%なので、Templateを選びます。
bOS KNXデバイスをアクティブにする
.jpg")
そのままだと、まだ使えないので、KNX Deviceをアクティブにします。
Devices > KNXをクリック。 Driver Enableが”False”になっているので、これを”True”にします。
.jpg")
“LED A On/Off”をクリックして、”Status Address”に”0/0/2″を入力。
.jpg")
“Values”のタブをクリック。
“Templates”を”Power”いします。
“Value”を”True”と”False”と操作すると、実機のスイッチアクチュエータのLEDもOn/Offされます。
ビジュアル画面 Themeの作成
ビジュアル画面をつくります。
.jpg")
Building > Thems > Themeをクリックして、”+Frame”を押してフレームを挿入します。
.jpg")
Devices > KNX Group > LED > “LED A On/Off”をドラッグします。

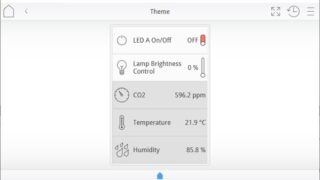
これでLEDを操作するスイッチができました。
bOS Clientから確認
ログイン設定は、bOS Configuratorと同じ用にします。

これで、LEDが操作できるようになりました。
位相制御ランプのコントロール
.jpg")
DeviceのSettingはこのようにします。
.jpg")
“Values”タブをえらび、Templateは”Dimmer”にします。
.jpg")
ThemeにDeviceをドラッグ&ドロップで、位相制御のランプがコントロールできる画面ができました。
操作確認

これで、LEDのOn/Offと位相制御ランプの制御ができます。
まとめ
以上、bOS Configuratorを使って操作画面からKNXデバイスを操作する方法をご紹介しました。
ポイントとしては、Deviceを作るときにStatusAddressを登録することと、制御にあったTemplateを選ぶところになります。
次回はセンサーの値を表示させてみます。